Wardriving was once a really popular sport, I myself loved mapping new areas with my trusty Orinco Gold Card. I’m not sure how popular it is these days but I thought I’d write this guide as I came across my GPS dongle and got set it up in Kali Rolling. I then processed the results and dumped them into a usable format which you can then import into Google Earth. As with all of my guides I hope at least one person finds it useful.
The Hardware
This was all setup on a Lenovo thinkpad with the Kali Rolling distribution, I used the following Wireless and GPS adapters which I’ve also included an Amazon link just in case you wanted to purchase them.
Wireless Adapter
I use an Alfa AWUS036NHA which has an Atheros AR9271 chipset and is well supported in Linux it also supports packet injection

Amazon – LINK
GPS Receiver
For the GPS side of things I chose to use the GlobalSat BU-353-S4 receiver. Purely because it’s well supported under Linux and Kismet.

Amazon – Link
Setting up the devices
There are some prerequisites we will need to install to get the GPS working which are not installed by default.
root@Hunter~# apt install gpsd gpsd-clients
Once we have those installed we’re pretty much good to go. Go ahead and plug in your GPS receiver and run the following. My device was located at /dev/ttyUSB0 but yours maybe different so please check.
root@hunter~# gpsd -n -N -D 2 /dev/ttyUSB0- -n Don’t wait for a client to connect before polling whatever GPS is associated with it. Some RS232 GPSes wait in a standby mode (drawing less power) when the host machine is not asserting DTR, and some cellphone and handheld embedded GPSes have similar behaviors. Accordingly, waiting for a watch request to open the device may save battery power. (This capability is rare in consumer-grade devices).
- -N Don’t daemonize; run in foreground. This switch is mainly useful for debugging.
- -D 2 Set debug level. At debug levels 2 and above, gpsd reports incoming sentence and actions to standard error if gpsd is in the foreground (-N) or to syslog if in the background.

To check whether your GPS receiver has locked onto satellites we can use cpsg which is used to test clients for gpsd, run the following command in a new tab or terminal window
root@hunter~# cgps -s- -s Be silent (don’t print raw gpsd data)

Like above you should see some relavant details regarding your position, heading and speed. If you don’t see something like the above then something has gone wrong.
On to Kismet
Ok, now that we know our GPS receiver is working fine from the above steps let’s launch Kismet and start collecting data.
root@hunter~# kismet
Initial Steps
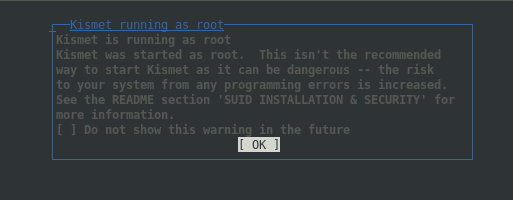
You will be asked a few questions when launching kismet which are pretty straight forward.

I was running my kali instance as root so if you are too you can ignore this and hit OK.

Select Yes here.

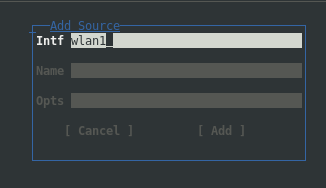
You can either change these or leave them as default. Next you will see a console window which you can close. You will then be asked to add a source which will be the name of your Wireless Device in my case it was wlan1


Once you have entered the correct device name select “Add”
Capturing
After the above steps you should now start seeing Kismet being populated with any Wireless SSID’s that it’s detected. Similar to the screenshot below. If it is then well done you’re successfully capturing wireless data.

Handling the Data
GISKismet is a wireless recon visualisation tool to represent the data gathered using Kismet, we can use this tool to import our captured data and then export into a format which is usable with GoogleEarth so we can visualise our Wardrive. Let’s go ahead and issue our command.
root@hunter~# giskismet -x Kismet-(YOURFILE HERE).netxml
We use the -x switch to tell the tool we’re importing an XML file, ensure you enter your capture file with the .netxml extension.

Now we’ve imported our captured data into GISKismet’s SQLite database we can now grab that data by performing a simple SQL query and exporting it into a kml file which is usable by GoogleEarth. Obviously name your ouput file anything you like.
root@hunter~# giskismet -q "SELECT * FROM wireless" -o YOURNEWFILE.kml- -q Query
- -o Output file
So we now have our newly created .kml file which you can open using GoogleEarth and you should have similar results to the below screenshot.

I Hope you found this guide quick, to the point and most of all helpful.
